The Lionbridge Laꜞnguage Cloud™ Workflow user interface is designed to give the user a simple but rich user experience with easy navigation and data access. The most common features are shortly presented below.
Many user interface elements in different views display a tooltip when you set the pointer on the element.
The left end of the Navigation Pane contains the menu for links to external sites, such as Freeway, Translation Workspace servers, and Online Review servers.
Click the News (envelope) icon to view the messages sent by the Lionbridge Laꜞnguage Cloud™ Workflow administrator to all users. A red alert sign on the envelope indicates when a new unread message is available. You can read the messages as many times you need during the period of their availability.
The user menu at the right end is for signing out from Lionbridge Laꜞnguage Cloud™ Workflow, opening the user profile settings, and for viewing the Terms of Use.

There are three tabs on the Home view for all users. The Projects tab, the Jobs tab, and the Tasks tab. The Projects and the Tasks tabs are visible for all users. The Jobs tab is visible for users who are Project Administrators at least for two projects.
The Projects tab displays the same information previously displayed on the Home tab, the current user's projects which have active jobs.
The Jobs tab lists the current user's on-going jobs in two sub-views:
ALL and TO CHECK.
The Tasks tab lists the current user's tasks in four sub-views:
ALL, ALMOST LATE, LATE, and ON TIME.
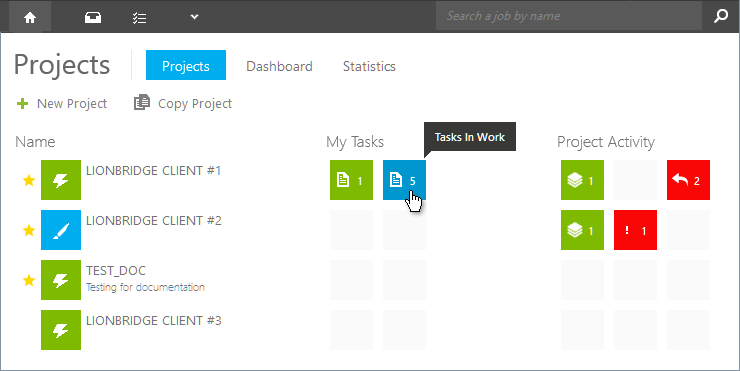
The Projects tab view (see the screen shot in the Tooltips section) lists all the projects assigned to the user and displays also the number of new jobs, different tasks and alerts.
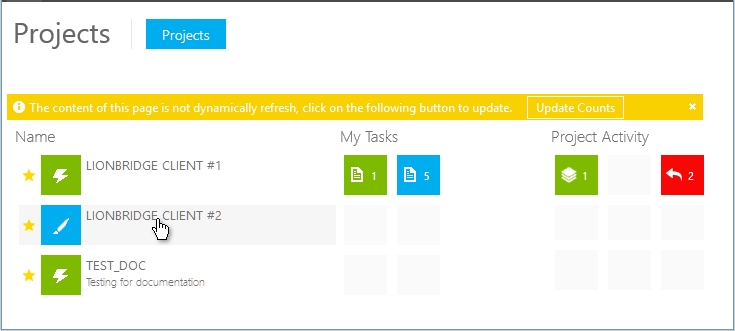
The color of the project icon displays the project status
(gray = archived, blue = template, green = active, red = inactive).
Clicking a project row in the Projects view opens the project's tab Tasks | In Work view.
The Main menu on the left shrinks to display icons instead of text headings when the browser window is adjusted below a certain width.
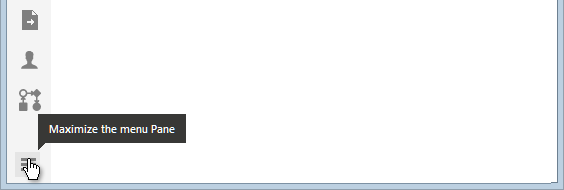
You can have the menu fully displayed by clicking the Maximize button at the lower left corner of the Lionbridge Laꜞnguage Cloud™ Workflow window.
The same button can be used for minimizing the menu.
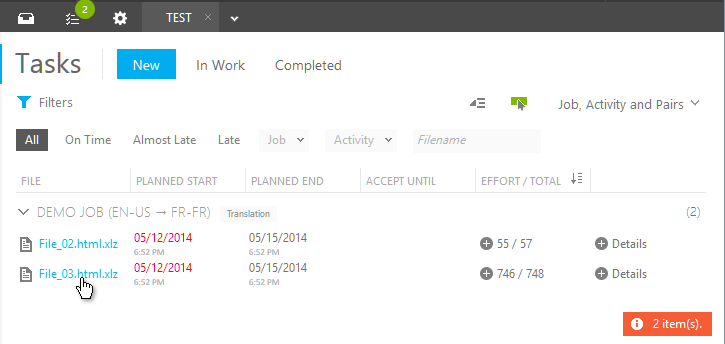
The Tasks tab view lists the current user's tasks in four sub-views:
All, On Time, Almost Late, and Late.
You can accept and reject new tasks on this tab by clicking any task row or selecting several rows and selecting the Action menu or the context menu Accept or Reject commands.
Main information areas can be viewed by opening different tabs. Each project can be viewed in a separate tab, and the view pane inside each project tab can display several different views to a project.
Some of the heading lines of the user interface have pop-up menus that can be opened by clicking the small black arrowhead ( ) on the heading line, for example on the Navigation Pane.
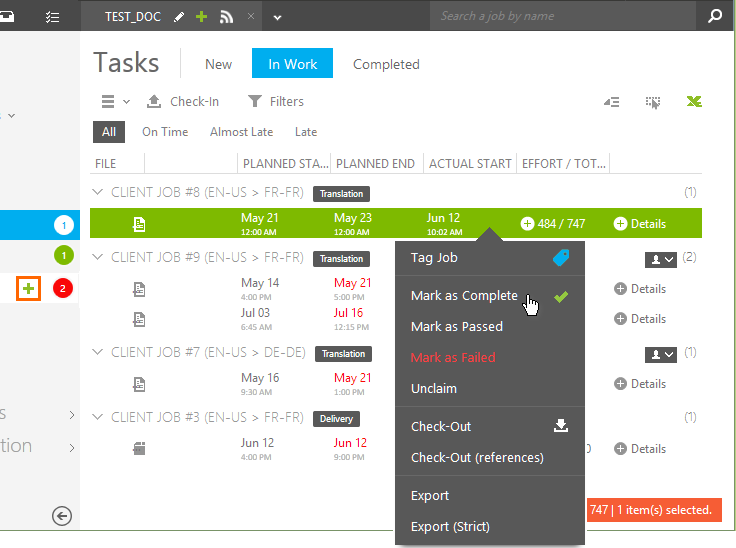
In the view pane clicking a row with the mouse pointer opens a context menu with the list of available commands (see the picture below).
 By clicking the Add button (displayed when you point at the menu item) at the end of a heading line in the Project Menu you can add items for example to the deliverables.
If the Job name is truncated, Lionbridge Laꜞnguage Cloud™ Workflow displays the full name when you point the name.
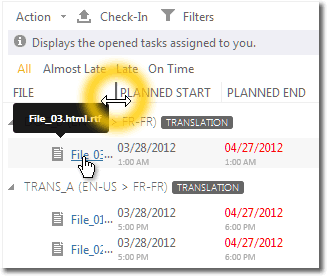
The width of all the columns in all views can be adjusted manually.
The user interface includes also other arrowhead icons, which, when clicked, trigger other functions. The most common of them are highlighted with red in the picture above. Clicking an arrowhead can hide or reveal additional panes, or rows of information.
The pop-up windows (dialogs) can be docked in the user interface by dragging the window to any border of the browser.
When the user drags the pop-up object to the right and the mouse cursor reaches the browser border, the pop-up is docked to right.
When the user drags the pop-up object to the left and the mouse cursor reaches the browser border, the pop-up is docked to left.
When the user drags the pop-up object to the top and the mouse cursor reaches the browser border, the pop-up is displayed in full screen.
Dragging the docked pop-up object away from the docked or full screen position restores the docked object to its original size.
You can sort the items by the date column values on the tabs of the project Jobs, Planning, and Status views.
You can sort by values of all date columns (Due by, Created on, Planned end, etc.). Sorting applies to all records, also to those not displayed on the current page. Items are sorted inside each group list.
The column by which the records are sorted is indicated by an icon displaying the direction of the sorting:
![]() Default sortable icon is displayed for sortable columns.
Default sortable icon is displayed for sortable columns.
![]() Ascending icon is displayed on ascending sort.
Ascending icon is displayed on ascending sort.
![]() Descending icon is displayed on descending sort.
Descending icon is displayed on descending sort.

You can sort tasks on the Effort/Total column by the Effort value in all Project | Tasks views, enabling you to prioritize what to do first.
In most of the views you can both filter and group the items. By filtering you can select which items are displayed, and to view only relevant items at a time. By grouping you can set which kinds of items you want to view together.
The grouping setting can be selected from the pop-up menu on the upper right corner in each view.
The view can include different viewing options for quick filtering of the items in the view. The selectors for the quick filtering can be found above the item list.
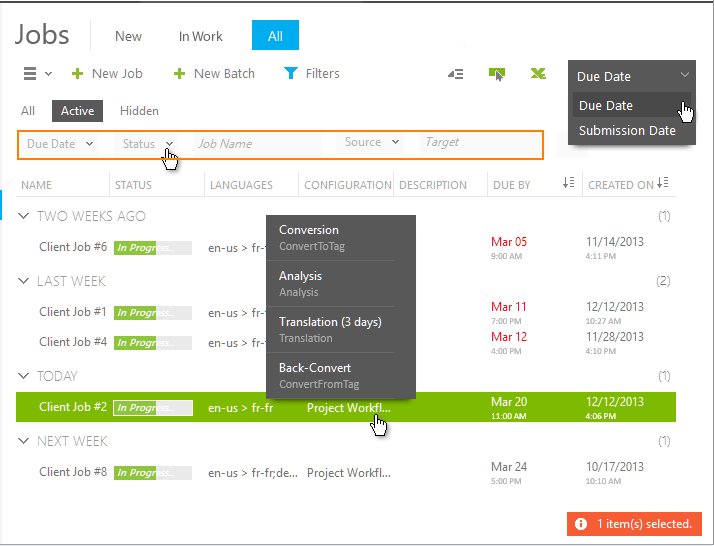
The filtering bar is hidden by default. To display it, click the Filters button in the left upper corner of the view (the button is hidden while the filters are displayed).
Depending on the currently open view, the filtering bar includes different criteria. You can select several filtering criteria and use them at the same time. Click the x to close the filtering bar.
You can filter the tasks by them being Community Exchange tasks or Lionbridge Laꜞnguage Cloud™ Workflow tasks. Filtering is available in the following views:
You can filter by files in the Tasks views. This makes easier to batch accept and reject activities by file (not by language).
A FileName filter field is a free text field working as in the Show history view, allowing you to type a part of a file name (without an extension) which is used as a filtering criterion.
When you filter by a file name, a file package is listed only if it contains a file with a matching name.
 By clicking the Expand/Collapse All button on the left from the grouping setting selector, you can display all the items under the list headings or only the list headings.
You can expand and collapse items under one specific heading by clicking the arrowhead before the heading.
 By clicking the Select/Deselect All button next to the Expand/Collapse All button you can select and deselect all the items in a view.
You can copy rows you have selected as text to the clipboard by selecting Copy to Clipboard in the context menu.
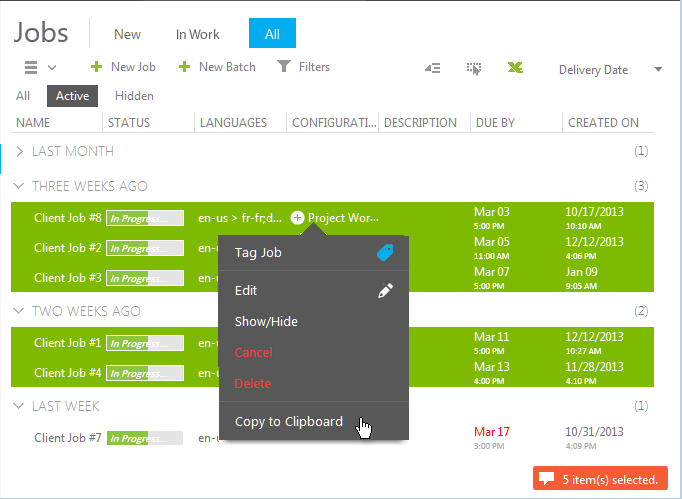
This command can be used in the following views:
Jobs | New | All
Planning | Planning | Unclaimed | Assigned
Status | Activities | Alerts | Files | Assignees.
This command displays the Copy to Clipboard dialog with the selected items as text. The items can be edited, even deleted, or only partly selected before using the browser's context menu Copy command or Ctrl+C keyboard shortcut to copy the items (the tab characters included) to the clipboard.
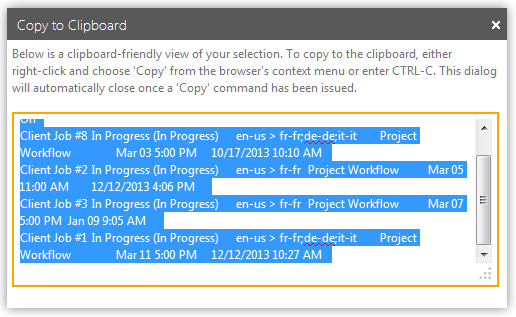
This command can be used in the following views:
Jobs | New | All
Planning | Planning | Unclaimed | Assigned
Status | Activities | Alerts | Files | Assignees.
 In most views, whatever items in the view are displayed, the item list can be exported as a locally savable Excel XLSX file. You can do this by clicking the green Excel button on the toolbar, and saving the XSLX file to your computer.
The user is notified when she forgets to fill a required field.
A red notification is displayed on clicking Save and Submit buttons, listing all fields that require an input value, also the file upload field.
Lionbridge Laꜞnguage Cloud™ Workflow can create quick charts immediately onscreen from some report data. All reports created by the Lionbridge Laꜞnguage Cloud™ Workflow can be downloaded to your local computer in Excel XLSX format. This way you can combine them with other data.
In some project views the Project Administrator can tag the items by job or by language, which filters other items out of the view. This way she can see only those items that are relevant at the moment.
An indicator is displayed, when Lionbridge Laꜞnguage Cloud™ Workflow retrieves items to be displayed.